Heos VTuber
Bring your avatar to life while streaming or recording. Your character reacts when you speak, blinks randomly, changes expressions with keyboard shortcuts or gamepad buttons, and can be customized with visual effects. You can capture audio from a microphone or from a website.
The program is available in English and Spanish.
Free Demo
The free version includes a semi-transparent watermark in the bottom center of the screen. All features are fully unlocked.
Paid Version (4.99 USD)
Remove the watermark completely.
Extra (Free)
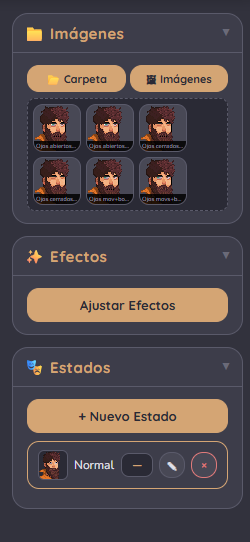
A folder with six example images and a sample configuration file. Load the folder, then load the config file to see a working project immediately.
Tutorial
Everything you need to create and control your avatar.
How to Use Backgrounds
Three background modes are available. Click the buttons in the top right corner of the viewport.
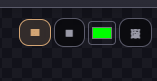
Square grid pattern – Default checkerboard style.
Solid color – Pick any color with the color selector.
Custom image – Upload your own image. While in image mode, hold the Control key and scroll with your mouse wheel to zoom the background in and out.
States, Base Images, and Variants — What Is the Difference?
The avatar system has three layers of variation. Understanding how they work together makes it much easier to set up expressive, natural-looking animations.
States — different moods or expressions
A state represents a distinct mood or situation your avatar can be in: normal, happy, angry, surprised, sleepy, and so on. You switch between states using keyboard shortcuts or gamepad buttons. Each state stores its own images and visual effects independently.
Base images — idle variation within a state
Inside each state there are two branches: Silent (not speaking) and Speaking (voice detected). Each branch can have one or more base images. When multiple base images are loaded, the system cycles through them automatically according to the branch's switching settings. This lets you create subtle idle variation — slight head shifts, breathing poses, different resting expressions — without any manual input. Your avatar never looks completely frozen even when nothing else is happening.
Variants — short animations triggered periodically
Variants are temporary images that interrupt the base display for a brief moment and then return to normal. They are used for things like blinks, winks, glances, or quick gestures. Each variant has its own interval (how often it may occur), duration (how long it stays on screen), and optional randomized timing so it never feels mechanical.
A practical example
Your avatar is in the Happy state. In the Silent branch you have three base images showing slightly different head positions, cycling every few seconds so the character looks alive. A Blink variant fires every four seconds or so, briefly replacing the current base with a closed-eye image. When you start speaking, the Speaking branch takes over with its own base images and variants. If the blink was mid-way through when you started speaking, a linked variant in the Speaking branch picks it up seamlessly.
Linked Groups
If you give the same name to a variant in the Silent branch and a variant in the Speaking branch, they become linked. When you switch branches mid-animation, the system continues with the matching variant instead of cutting abruptly.
How to Configure States
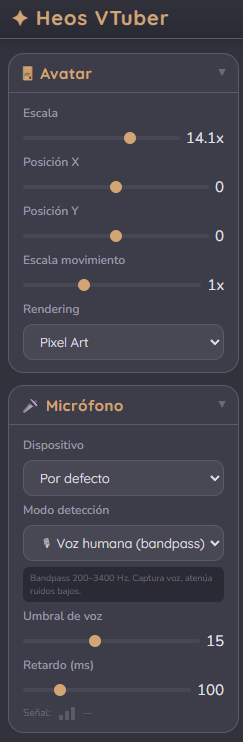
Use the right panel to create new states. Each state can be renamed or deleted. Click any state in the list to activate it. The current state name is shown at the top left of the viewport.
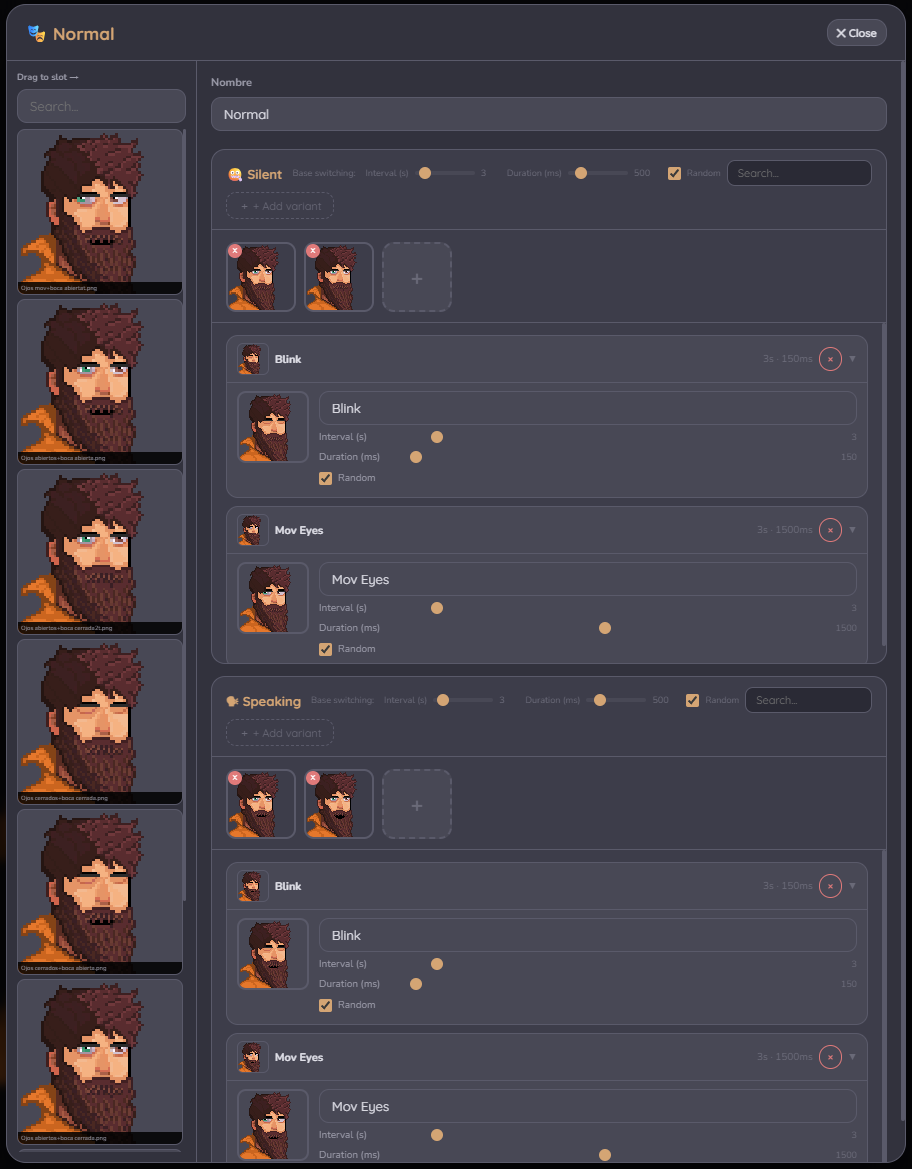
Open a state's edit window to manage its branches. In each branch you will see the base image area with a + button to add more base slots and the variants list below. When multiple base images exist, switching controls appear in the branch header: interval, duration, and randomness. Use the search bar to filter variants by name.
Keyboard Shortcuts
Open the shortcuts window using the keyboard button in the top header.
Keyboard Tab
Assign global actions and state switches to key combinations such as F1, Ctrl+Z, Ctrl+Shift+A, or Alt+1. Click the empty shortcut area next to any action or state. When the label shows three dots, press your desired combination. Shortcuts are saved instantly.
Available actions: microphone toggle, test mode, next state, previous state, save config, and direct state switching.
Note: keyboard shortcuts require the browser window to be in focus.
Gamepad Tab
Connect any standard controller such as Xbox or PlayStation gamepads. Click the assignment area and press a button on your controller.
Visual Effects
Open the Effects window from the right panel. Each state stores its own effect configuration.
Speaking Effects
Shake, Bounce, Scale pulse, Wave rotation, and Wave movement activate while speaking.
Idle Effects & Transitions
Float, Breathe, Sway, Darken, Jump, Fade in, Zoom in, Slide effects, Flip, and Blur transitions can remain active continuously or trigger when entering a state.
All effects include adjustable intensity and speed controls.
Using Heos VTuber in OBS
You can just capture the screen orrrrrr... Heos VTuber can be added to OBS as a clean, transparent Browser Source — no screen capture needed. The avatar is captured directly as a layer you can place, scale, and combine with other scenes. The program includes a one-click export that bundles your configuration and images into a standalone HTML file ready to drop into OBS.
Step 1 — Export your avatar as an OBS-ready file
Set up your avatar in the program: load images, define states, adjust effects, configure shortcuts, choose your background. When everything looks right, click the OBS button next to Save in the top header. A file named vtuber-OBS-YYYY-MM-DD.html will be downloaded. It contains everything — images, configuration, microphone logic, shortcuts — in a single self-contained file. No folders, no dependencies. Save it somewhere stable on your computer.
Step 2 — Allow the microphone in OBS (one-time setup)
OBS uses an embedded browser for its Browser Sources, and by default that embedded browser blocks microphone access. You need to enable it once with a launch flag. This is a standard, documented procedure.
On Windows:
1. Close OBS completely (check the system tray to make sure no OBS process is running). Clone the OBS shortcut (in case you want to keep the original)
2. Right-click your OBS Studio shortcut on the desktop or Start menu and choose Properties.
3. In the Target field, go to the end of the line, add a space, and paste:
--use-fake-ui-for-media-stream
The line should now look like:
"C:\Program Files\obs-studio\bin\64bit\obs64.exe" --use-fake-ui-for-media-stream
4. Click Apply, then OK. Open OBS from that shortcut from now on.
On macOS:
1. Open Terminal and run:
/Applications/OBS.app/Contents/MacOS/OBS --use-fake-ui-for-media-stream
2. Also go to System Settings → Privacy & Security → Microphone and make sure OBS is allowed.
On Linux:
Launch OBS from a terminal with the same flag appended:
obs --use-fake-ui-for-media-stream
This flag tells the embedded browser to auto-accept microphone permission requests from local sources. It only affects Browser Sources you add yourself.
Step 3 — Add the file as a Browser Source
1. In OBS, in the Sources panel, click the + button and choose Browser.
2. Name the source (for example, Avatar) and click OK.
3. Check the Local file box and browse to the vtuber-OBS-YYYY-MM-DD.html file you exported. You can double-click to open it and copy the url directly.
4. Set Width and Height to match your canvas (typically 1920 × 1080, but anything works — the avatar auto-scales to fit).
5. Make sure Control audio via OBS is unchecked. The avatar reads your microphone directly; you don't want OBS routing it.
6. Click OK. Your avatar should appear immediately, reacting to your voice.
Tips
• Apply a chroma key filter to remove the background.
• Keyboard shortcuts and gamepad bindings configured in the program still work inside OBS. To use keyboard shortcuts you need to right-click the source and choose Interact, which opens a focusable window; you can keep it minimized while streaming. Gamepad bindings work as long as OBS has focus.
• To update your avatar, just re-export from the program (overwriting the old file is fine) and right-click the Browser Source → Refresh in OBS.
• If you see a microphone permission overlay when the source loads, it means the launch flag is not active. Close OBS completely and reopen it from the modified shortcut.
Feedback & Support
I love seeing how you use Heos VTuber in your projects. If you have questions, ideas, or just want to share what you've made, feel free to leave a comment or reach out directly.

If you found this tool useful, taking a moment to
leave a rating
really helps. Thanks for the support ❤️
Download
Click download now to get access to the following files:
Leave a comment
Log in with itch.io to leave a comment.